|

Greener GP/EG/Police Gun Disassembly/Instructions
Greener GP/EG/Police Gun Reassembly
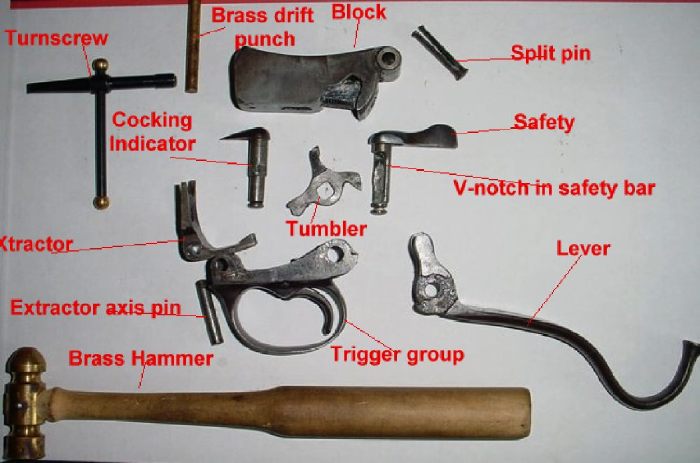 |
| This is what you start with. The hammer is for tapping in the split pin, and for beating the thing when it won't go together. A good, narrow turnscrew will help you not bugger the screw heads, which are often too narrow for modern screwdrivers. This particular example is a combination turnscrew, pick, and nipple wrench for black powder revolvers. It works just as well on Martinis. The third piece of equipment is a brass drift punch. Because the brass won't mar the iron in the Martini action, it is useful both for disassembly (driving out the cocking indicator and extractor axis pin) and reassembly (as a guide for putting those same parts back in).
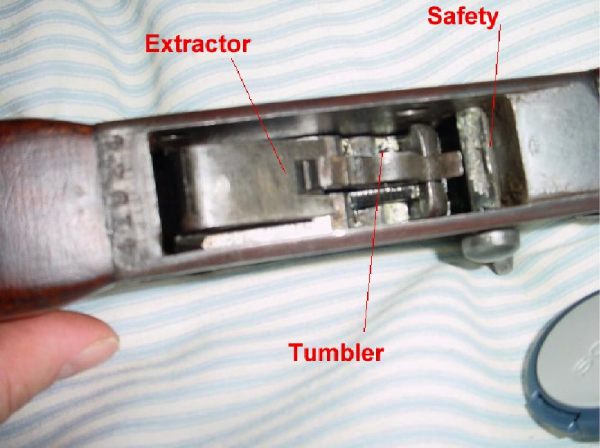
Notice the three arms on the tumbler compared to the normal two on a Martini-Henry tumbler. The hooked third arm off the back is what engages the safety. |
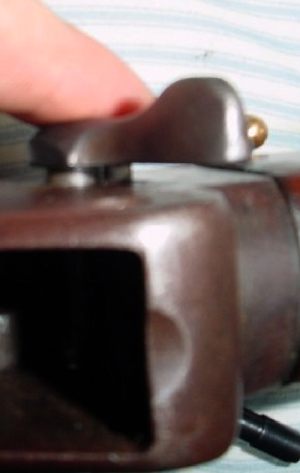 |
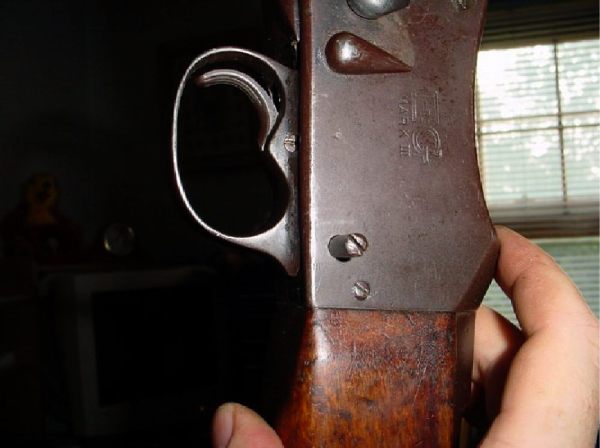
| First, insert the safety. There are two dished indentations on the back of the lever. Put one of these over the spring-loaded nub on the frame and push in. |
 |
| Turn the retaining screw to keep the safety in the frame. |
 |
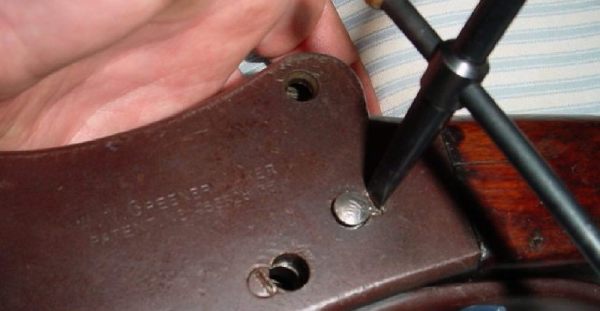
| Next, insert the block, front first, from the top. Wiggle it around until the hump on the back of the block settles into the recess in the frame. The holes for the split pin will line up. Might as well put it in now. Turn the action over and push the block into battery (a.k.a. raised). |
 |
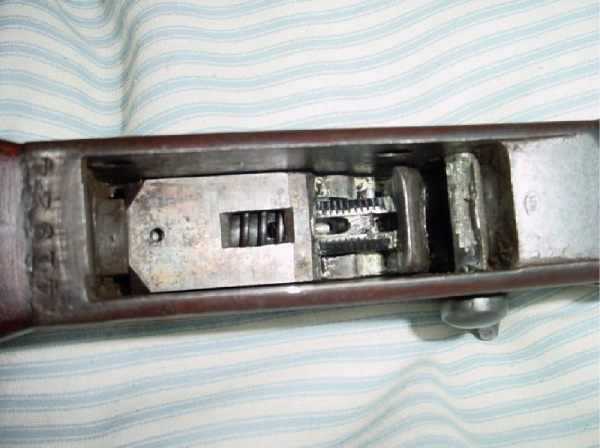
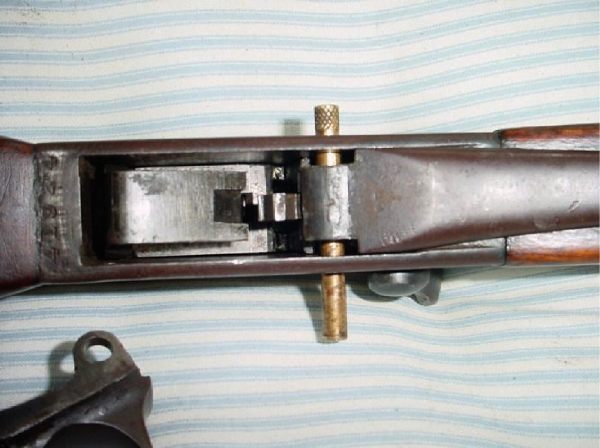
| Next, start dropping in the innards. Extractor goes in first. Make sure it's all the way up in the extractor cuts. Then put in the tumbler. Skinny arm goes into the notch in the striker. Note how the notched arm of the tumbler rests in the groove in the extractor. The safety is in “Fire” position, allowing the hooked arm of the tumbler to rest in the V-shaped trough of the safety bar. |
 |
| Next, insert the lever so the “ears” of the lever are in the slots of the block. You will notice, the gap between the ears is wide at the top and narrow at the bottom. The narrow section fits over the tumbler and holds it in place. Insert something in the cocking indicator hole to keep everything lined up. Here we are with the lever in, and a brass drift punch holding everything in place. Ready to insert the trigger group. Remove the brass punch and slide the back of the trigger group over the lever. Push it all the way back so it is snug against the lever. The narrow notch in the lever will hold the tumbler more or less in place while you're doing this, so try not to move the lever. If all goes well, you should be able to reinsert the brass punch without any trouble when the trigger group is in. |
 |
| Push the brass punch out with the cocking indicator. It may take a little wiggling, but no real force necessary to push it all the way through. |
 |
| The action reassembled, uncocked, and safety set to “fire”. All that remains is the extractor axis pin. |
 |
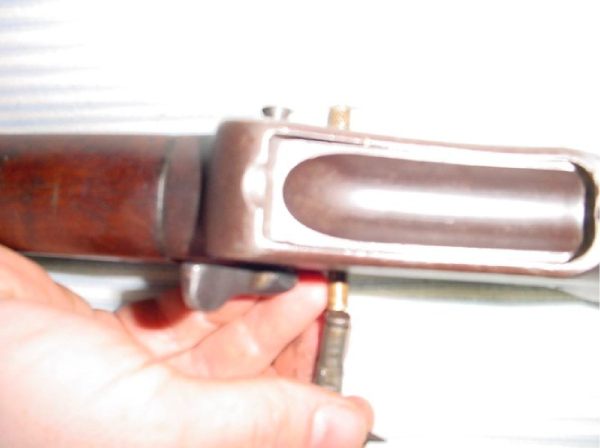
| It is easier to get the extractor pin in if you hold the gun muzzle-down and wiggle it a little. Using a brass drift punch here will work, too, provided you put it in from the left side of the action and drive it back out the same way.
And that's all there is to it. And that was the “hard” way. |
![]()
Martini Home | The Boxer-Henry Cartridge | Carbines | Infantry Rifles | Zulu War | Links | Bayonets | Markings
Questions, comments, something to contribute? Contact me, Jason Atkin, at the address below...
jmatkin@martinihenry.com
Last Modified: 02/11/05