Okay, disassembling your Martini was so easy, putting it back has got to be hard, right? No, not really. It just takes a little practice and some trial and error. Begin by reinserting your trigger guard assembly, with the operating lever and extractor in place, into the bottom of the rifle. Once in place, screw in the Extractor/Trigger Guard Retaining Screw (the slot of the screw should be on the right side of the rifle). This will attach the front end of the trigger guard to the rifle, and will keep the extractor in place. Next, drop the tumbler in from the top. The sear end should face forward to allow it to engage the tip of the trigger. Install the Lever/Tumbler Axis Pin Keeper Screw, and align the cutout in the screw so the pin can pass. Gently insert the Lever/Tumbler Axis Pin (a.k.a. Cocking Indicator). Make certain it passes through the holes in the Trigger Guard, the holes in the operating lever, and though the square cutout in the Tumbler. Also, pay particular attention and ensure that the cocking indicator will be in the vertical position when the weapon is decocked. This may require a bit of tinkering to get it to slide in. If necessary, loosen the Extractor/Trigger Guard Retaining Screw and wiggle the entire trigger guard assy forwards and back while applying pressure to the Lever/Tumbler Axis Pin. It should pop into place. If necessary, a few gentle taps from a rubber mallet may be helpful. Once in place, tighten the Lever/Tumbler Axis Pin Keeper Screw. This was the easy part of the reassembly. Once the trigger guard, extractor, tumbler, operating lever and Lever/Tumbler Axis Pin are in place, the last step is installing the breechblock...

Pull the trigger and hold it back. Push forward on the cocking indicator till it has rotated completely forward. Release trigger.

Open the operating lever 1/2" or so.

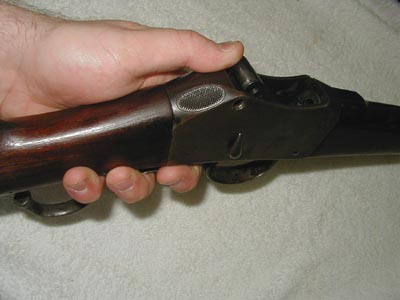
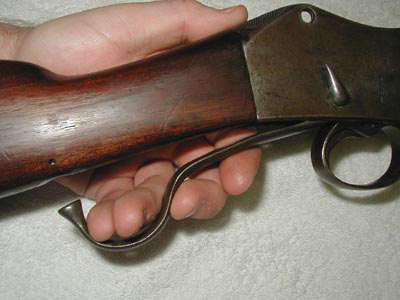
Insert the breechblock into the action body front first. At this point, the rear hump of the breechblock will protrude from the top of the action body. Notice how I keep my little finger between the operating lever and buttstock to keep the lever open 1/2".

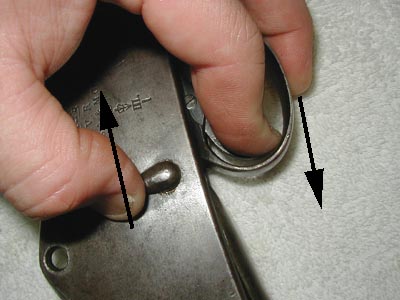
Using the heel of your hand, press on the rear of the breechblock, and at the same time slowly open the lever. The breechblock should spring into place. Sometimes a bit of fidgeting is necessary to pop the block back in. I've found the best way is to keep pressure on the rear of the breechblock while you slowly move the operating lever up and down. You'll easily be able to tell when the tumbler engages the slot in the striker, and the block pops into place.

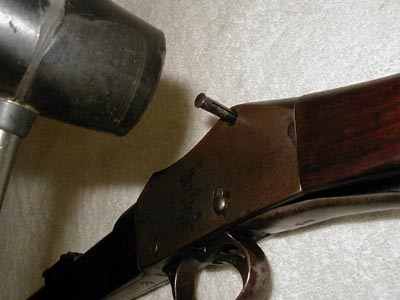
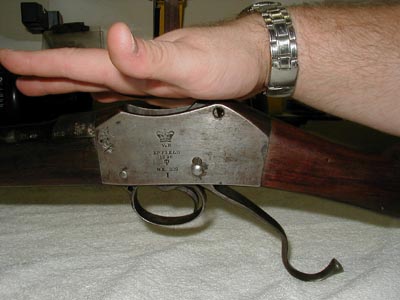
Reinstall the breechblock split pin with a rubber or wood mallet, test for proper operation, by cocking and dry firing (preferably with a snap cap in the chamber and the weapon pointed in a safe direction).

Martini Home | The Boxer-Henry Cartridge | Carbines | Infantry Rifles | Zulu War | Links | Bayonets | Markings

Questions, comments, something to contribute? Contact me, Jason Atkin, at the address below...

jmatkin@martinihenry.com
Last Modified: 12/12/03