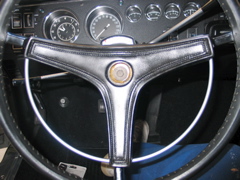
Step 1 is to disconnect the battery. You don't want to be sounding the horn every 5 seconds while doing this job. Next, remove the plastic insert with the Dodge logo. Knowing how hard these are to find, made this a nerve-wrenching job.
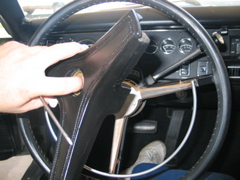
Remove the bolt, and the horn pad comes off.
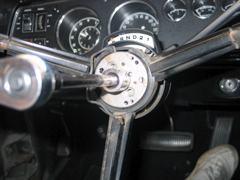
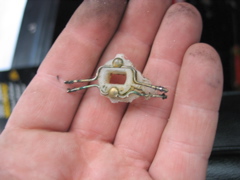
Remove the three phillips screws that secure the horn ring to the wheel.
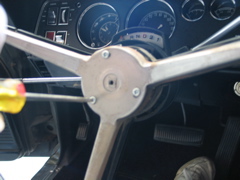
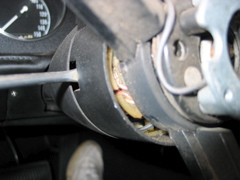
Here's the bare wheel.
Here's a side view, showing the top portion of the turnsignal switch, beneath the wheel.
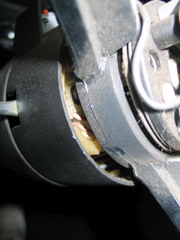
Note the exact routing of the horn wire, so you can put it back the way you found it when reassembling.
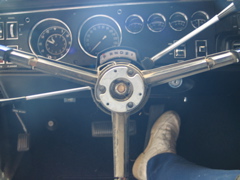
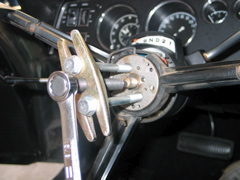
Disconnect the wire with the spade connector, then, remove the three additional phillips screws, and the horn mount comes off.
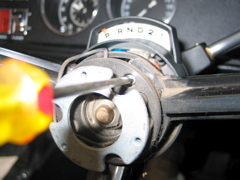
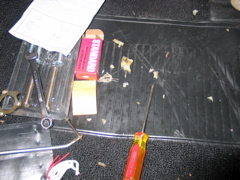
Okay , break out the 3/4 inch socket, and your steering wheel puller...
Remove the nut and washer.
Bolt on your wheel puller. These can be borrowed from chain parts stores. I bought mine for $10, and have used it numerous times over the years.
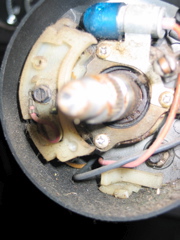
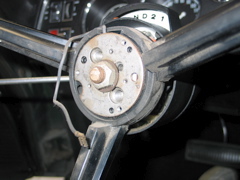
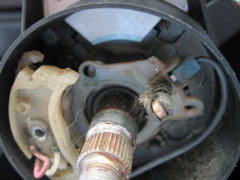
Here's what I was faced with when I got the wheel off. Lots of dirt, grease, dog hair, and chunks and pieces of the old turn signal switch that had settled to the bottom of the housing.
The plastic on the switch was incredibly brittle. As you'll see in upcoming pics, I was able to simply break most of it off with pliers.
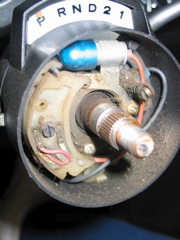
Another shot of the gackt inside the houseing. The gear-selector lamp housing was really corroded.
The broken bits.
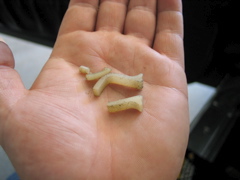
The bits again. These include the cam arms which are supposed to cancel the blinker.
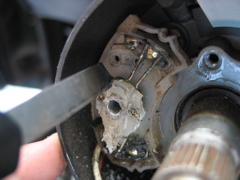
Okay, so, here's what we're dealing with. The top part of the switch is the part that comes from Standard. The next step is to remove the long screw that holds the switch together. This also holds the turn signal lever in place, so when you remove it, it will drop out of its slot.
Remove the three phillips screws that hold the lamp, and the base of the switch in place. This step isn't really necessary, but I found it beneficial to get the lamp out of the way, and to be able to move the switch around more freely.
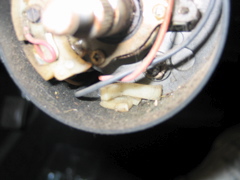
! SNAP ! There goes a chunk of the top portion of the switch.

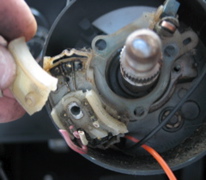
Cut the wires off as close to the switch as possible, and continue to break away the top portion of the switch. Be very careful not to break or damage the bottom portion of the switch assembly, or you'll be sunk.
When I got all of the outer plastic broken away, I found that the plastic closest to the shaft was in good condition. I had to resort to heating a razor knife, and melting through the plastic. I didn't want to damage the bottom portion of the switch, since I don't know if they're available.

Heating the razor knife to melt away more of the plastic.
Wrestling the bugger off the shaft.
FINALLY OUT!!!!
Mess on the floor.
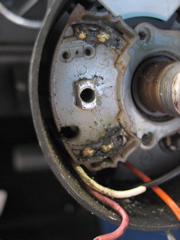
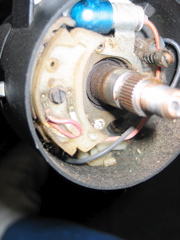
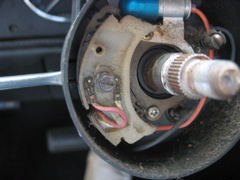
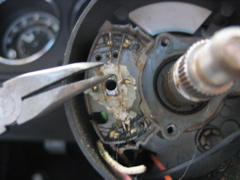
The lower portion of the switch. Notice all the grease that has turned into concrete over the years?
Those brass buttons are the actual switch contacts. It's quite a caveman type switch. I'm amazed it works.
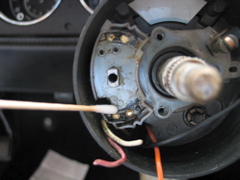
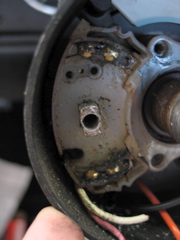
I used multiple wooden-handled cotton swabs to remove the concreted grease, and to clean the contacts.
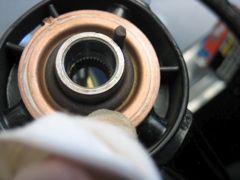
You'll also want to remove grease and corrosion from the contact ring on the steering wheel, and the little tiny roller contact that makes contact here.
I didn't feel right putting the gear-selector lamp housing back in all nasty and corroded. I mounted a short length of a medical cotton swab in my dremel, and used dabs of Mother's Mag and Wheel polish to make it look new!
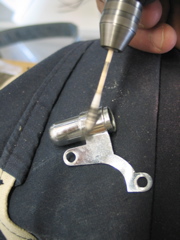
After polishing, it looked like a brand new part! Definitely pick yourself up some medical cotton swabs. They come in so handy!